Category: Fabric Manipulation
-

Themed school workshops
I love collaboration; I find it exciting and engaging both creatively and practically. Sharing skills, knowledge and expertise is vital to creating a good outcome and I always find it pushes my own creative boundaries and helps me work better and learn all the time. Whether it is working with schools, community groups or other makers, I…
-
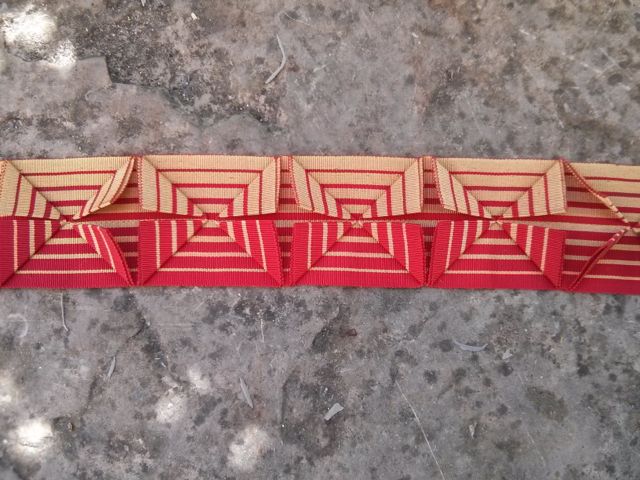
Pleated dress and hat decorations
In my research into manipulated fabrics, I have often come across trimmings created using pleated or gathered ribbon, most often on hats, although sometimes on garments too. 18th century dress trimmings are usually made from self-fabric (strips of the same fabric the garment is made from) rather than ribbons. Box pleating is common, as are…
-

Fabric Manipulation : Stitch & Slash
Would you believe that ripped jeans of the 1990s are simply harking back to the 16th century? For a brief period, it was the height of fashion to ‘pink’ or slash luxury fabrics to create pattern and to reveal yet another fancy fabric underneath. That’s where the term pinking shears comes from, although they appear somewhat later.…
-
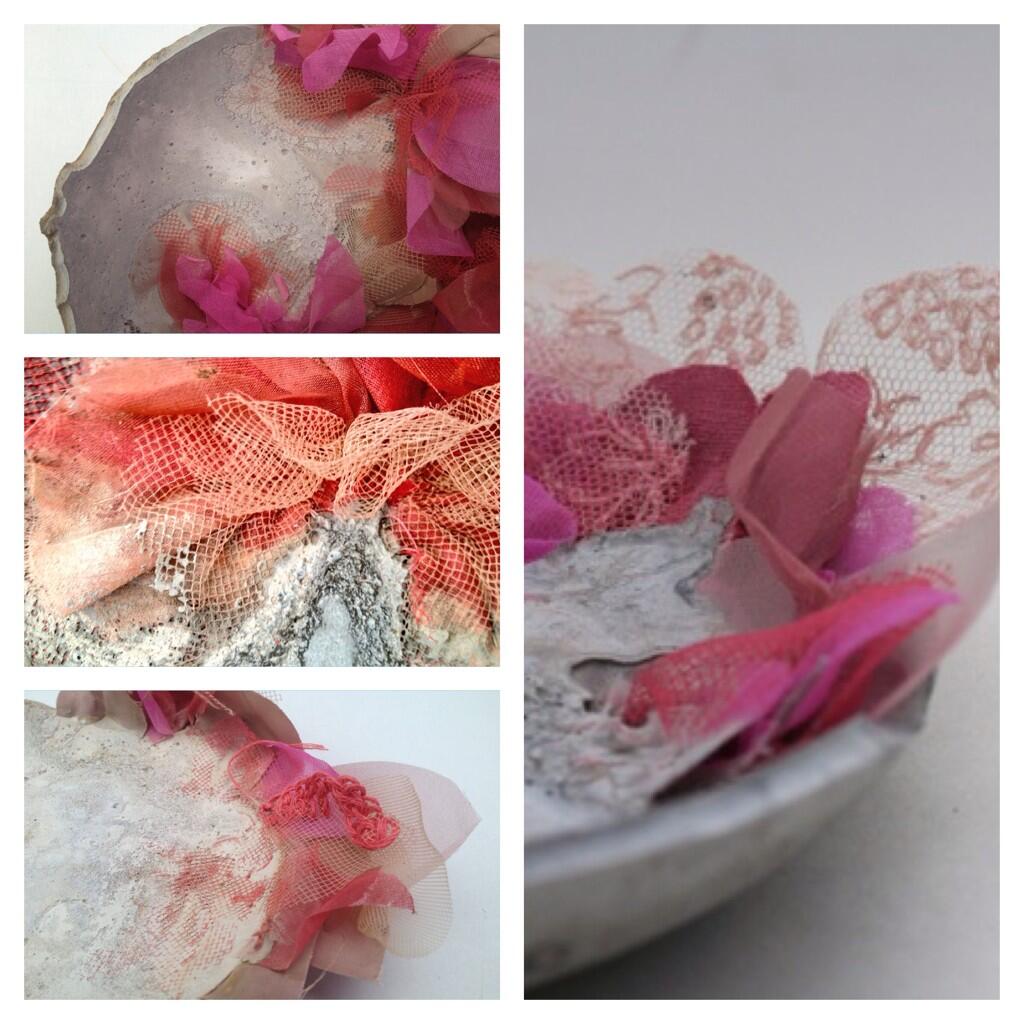
Collaboration with Bethany Walker: work in progress
I’ve long been fascinated by Bethany’s combination of textiles and cement; the contrasting soft and hard materials, the transformation of cloth from malleable to solid objects and the potential her innovative techniques would hold for my kind of manipulated textiles. Last year I applied to a-n’s collaboration bursary to fund our travel and expenses to…
-
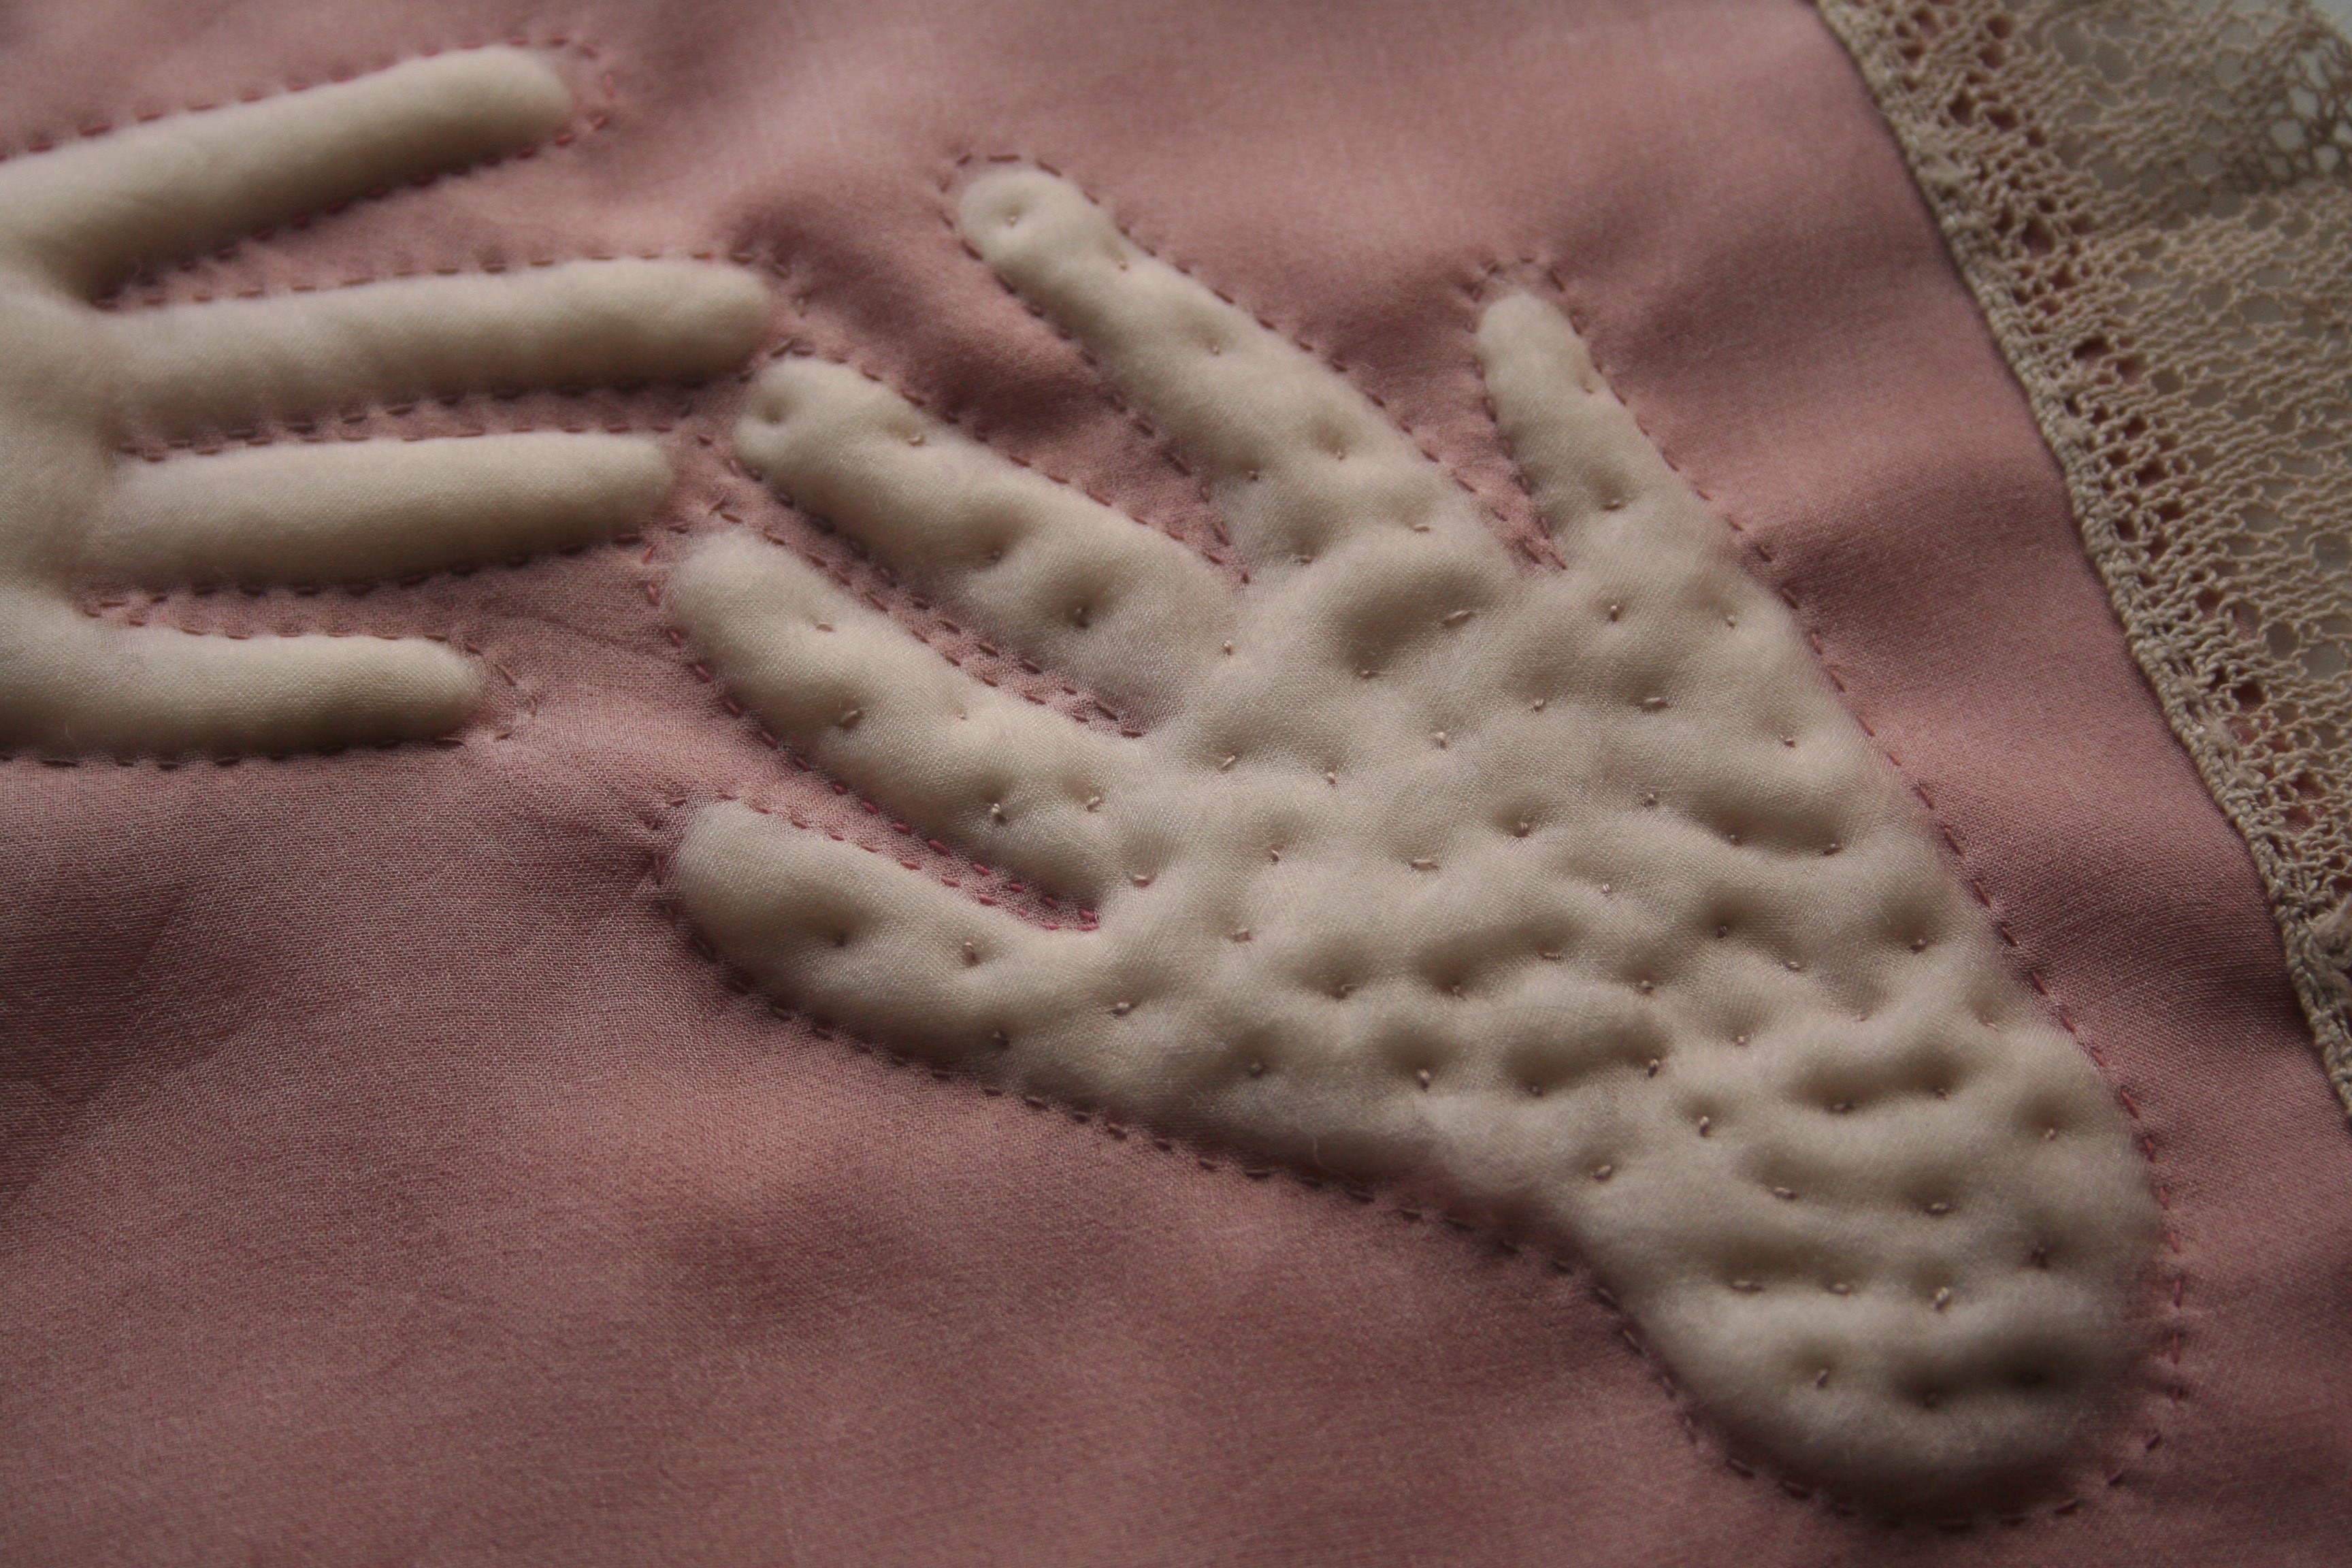
Trapunto Quilting
Trapunto, Italian quilting or stuffed quilting is an old and rather under-appreciated technique which I am a huge fan of. Unlike ‘normal’ quiting, where two layers of fabric have a layer of wadding between them and are stitched through all the layers, Trapunto uses two layers of fabric and the stuffing is only placed in…
-
2014 textiles workshops
Just a brief outline of the new workshops to come in 2014, full details soon! Workshops 2014 All workshops are 10am-4pm on Saturdays at Ruth Singer Studio, Leicester. £55 each or book 3 for £150 Miniature Art Quilts. 25th January Shadow Embroidery. 23rd February Cut-surface quilting. 22nd March Family Stories. 26th April Handmade fabrics. 31st…
-
Exhibitions at Waddesdon
There’s textile delights aplenty at Waddesdon Manor at the moment. I particularly wanted to see Sacred Stitches, an exhibition of ecclesiastic textiles from the Rothschild Collection which is reviews in Embroidery magazine (July / August). I love Medieval church textiles so was excited to see examples that have not been displayed before, and I was…
-
Apply & Layer
Final part of Fabric Manipulation book preview. Read about the other chapters: Pleat and Fold & Stitch and Gather The Apply & Layer chapter covers a whole lot more than just appliqué, although the majority of the techniques are appliqué in its loosest sense. Layering up fabrics and applying shapes on a foundation have many exciting possibilities and…
-
Stitch & Gather
Part two of Fabric Manipulation book previews. It is quite hard to define and name this group of techniques – Stitch & Gather is the best I’ve come up with. This part of the book covers a wide range of techniques where thread is used to create shape and structure, often by gathering with simple…